Author: Skillwave Training
When you are facing a scenario where you need to create a Dynamic Calendar Table (or Date Dimension Table), we take in consideration that we could create such table in Excel and use it later in our Time Intelligence Scenarios with Power Query or Power Pivot.
Most of the time, this Date dimension would be too long and would contain dates that are not relevant to the current report. (Like dates from the year 2020 for example and we only have data until the year 2015; that translates into 5 years of emptiness or waste in our report)
There are other scenarios where you simply want a nice calendar table in with text labels or other formats using your specific culture (Spanish, Portuguese & such).
This Pattern will try to show you how to create a Calendar Table, how to use some of the Date functions found in Excel, and how easy it is to work with Power Query.
Before we begin adding any type of code, we need to create the query. For that, we’ll go to Power Query -> Other Sources -> Blank Query.
That will launch the Power Query Editor and within that window we can add our own code in the formula bar. Inside that bar we add the following code:=#date(2013,1,1)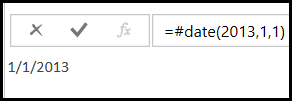
You’ll notice that we just added something called a literal by using #date(2013,1,1). What we did is simple – we added a date value. 2013 is the year value, the second parameter is for the month and the last parameter is for the day.
We added that in our first step. The name of that step is Source and it holds the value of the start date of our calendar table.
Let’s go ahead and create a new custom step by clicking on the fX icon right in the formula bar. This will add a new step called Custom which would reference to the previous step. We would like to change that original code in the formula bar to be this one:= List.Dates(Source, Number.From(DateTime.LocalNow())- Number.From(Source) ,#duration(1,0,0,0))
Here’s the breakdown of that formula:
This formula returns a List of Dates as you can see in the next image: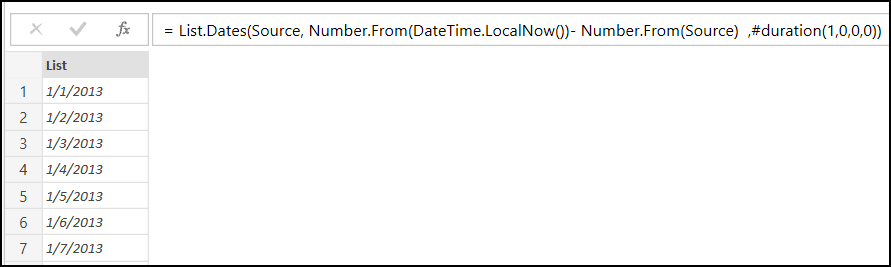
Go ahead and convert that list into a table using the List Tools ribbon. After you convert it into a table, please change the data type of that column to be Date and rename that column to something more descriptive like Date.
Next step is to add the much needed columns such as Month Number, Year, Start of the Month Date, End of the Month Date and all that good stuff.
We do that by simply following these steps (please make sure that you select the Date Column):
Here’s how the result would look like: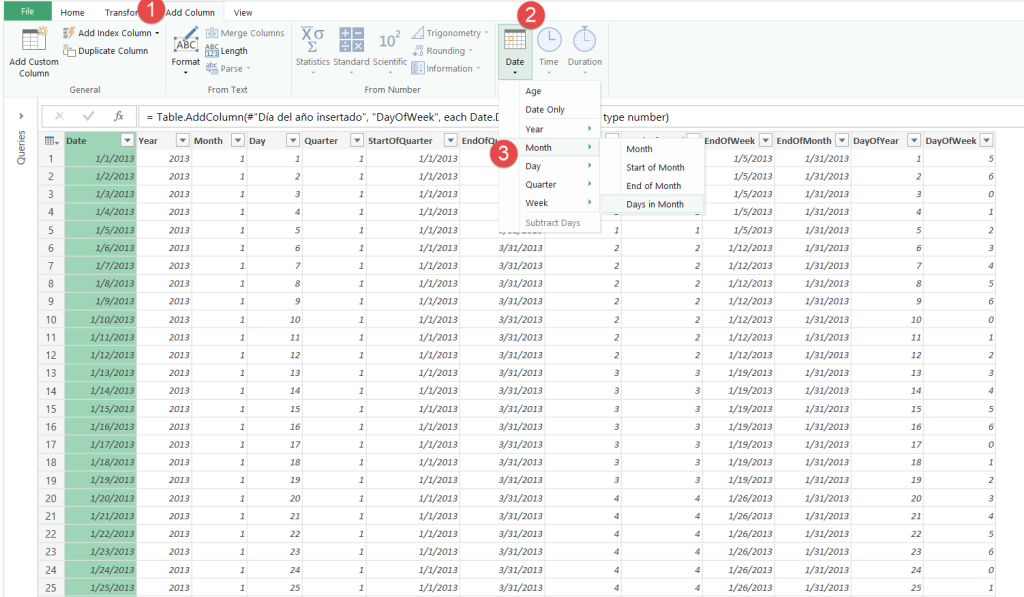
This is the last step and we’ll add some new custom columns by going to Add Column -> Add Custom Column.
Next, we’ll add these new columns by inputting the formulas to the Add Custom Column window:
Date.ToText([Date], "MMM", "es-419")Date.ToText([Date], "ddd", "es-419")In that last parameter we used the text value “es-419” so we can get the labels in Spanish.
You can use the following link to see the National Language Support (NLS) API Reference and find other cultures. This last parameter is optional and if you don’t use it then all will be calculated using the English (en-US) language.
The Final Result of this could look like this: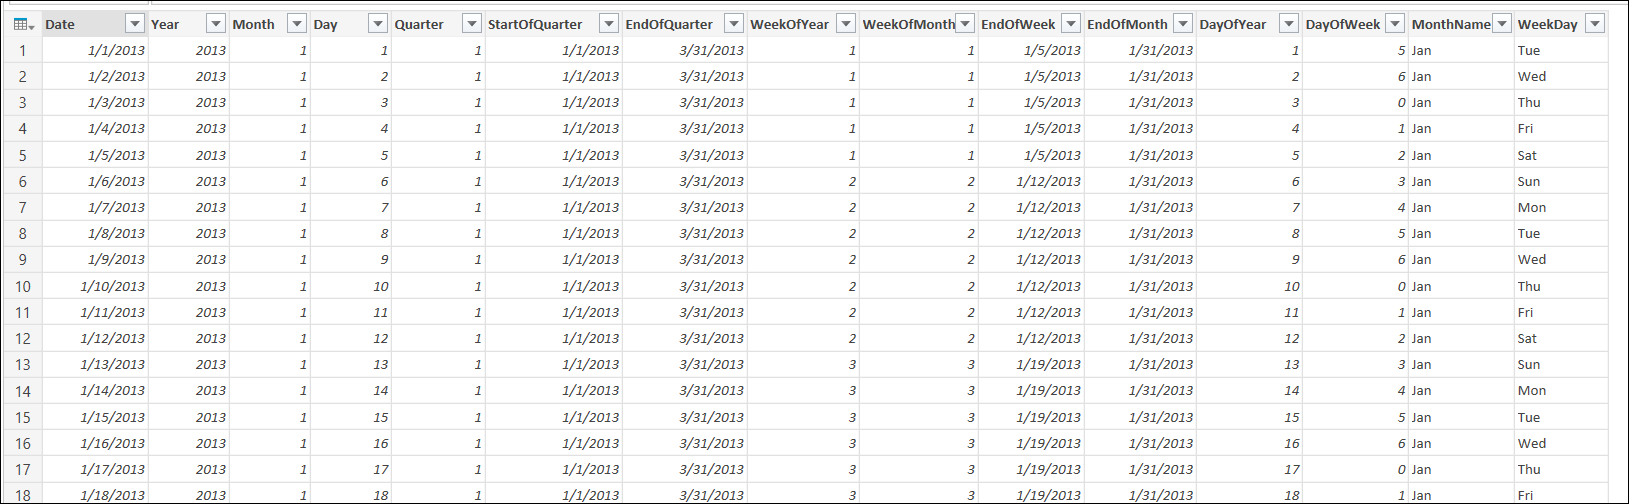
We now know how to create a simple Dynamic Date Dimension or Calendar table and how the UI works in order to create some new date columns. This truly shows how extensible and easy to use Power Query is.